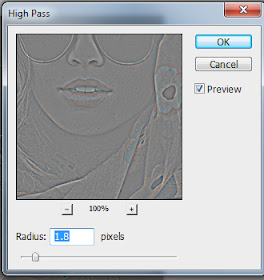
Step 1.
Create a new layer by going to Layer>Duplicate Layer. Rename the new layer to whatever makes the most sense to you.
Step 2.
Next go to Filter>Other>High Pass. Set the radius to somewhere between .05 to 3.0. The higher the radius the sharper the image.

Step 3.
Now go to Image>Adjustments>Hue/Saturation. Turn the saturation all the way down. Set blending mode to Overlay.
Enjoy your newly sharpened image.
Disclaimer: Because the quality of the original image was high to begin with, the changes are very slight and may be hard to notice. Use sparingly.


Thanks for these tips! By the way, all your lookbooks are really very pretty, a joy to watch!
ReplyDeleteMarjolijn - customer from Belgium :)
Your photo-doctoring tips are some of my favorite posts of yours. Thanks for this handy tip!
ReplyDeleteThe Dewey Decimals
Could you explain why you recommend this method over simply using the "Sharpen" filter?
ReplyDeleteI'm not being a smart aleck, I am honestly curious about why this method is better. Any insight you could provide would be very much appreciated - thanks! :)