Showing posts with label Project DIY. Show all posts

Thursday, March 29, 2012

Project DIY: Floral Ankle Straps


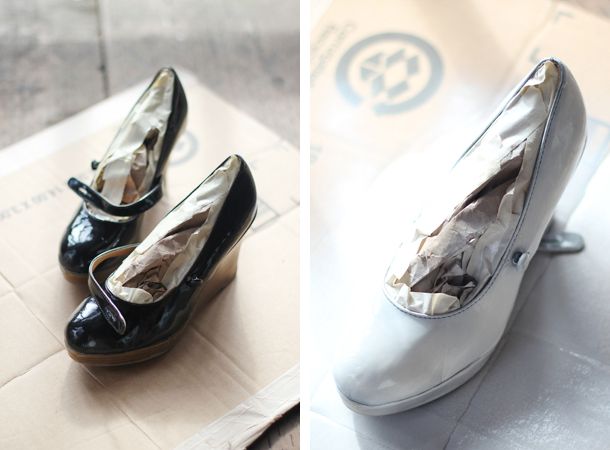
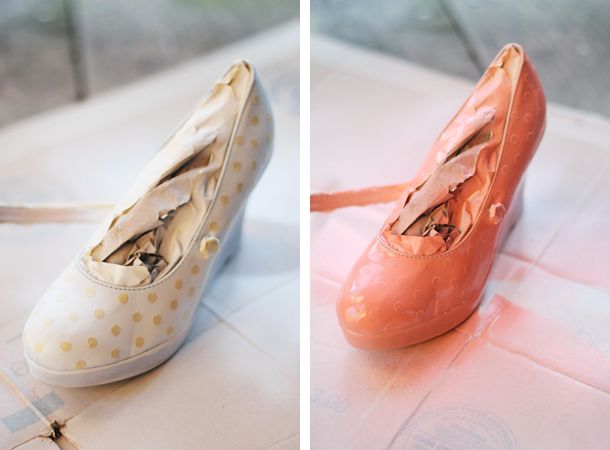
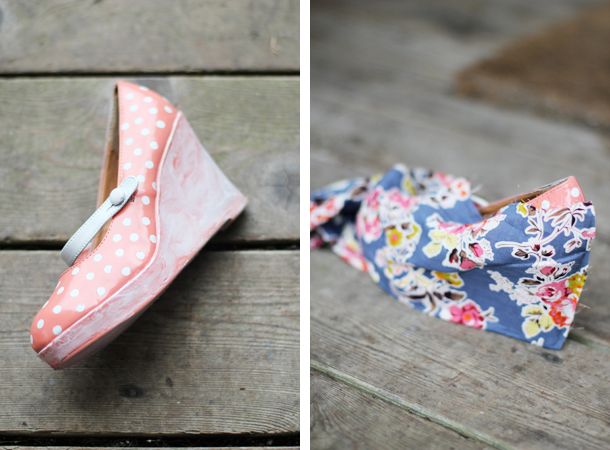
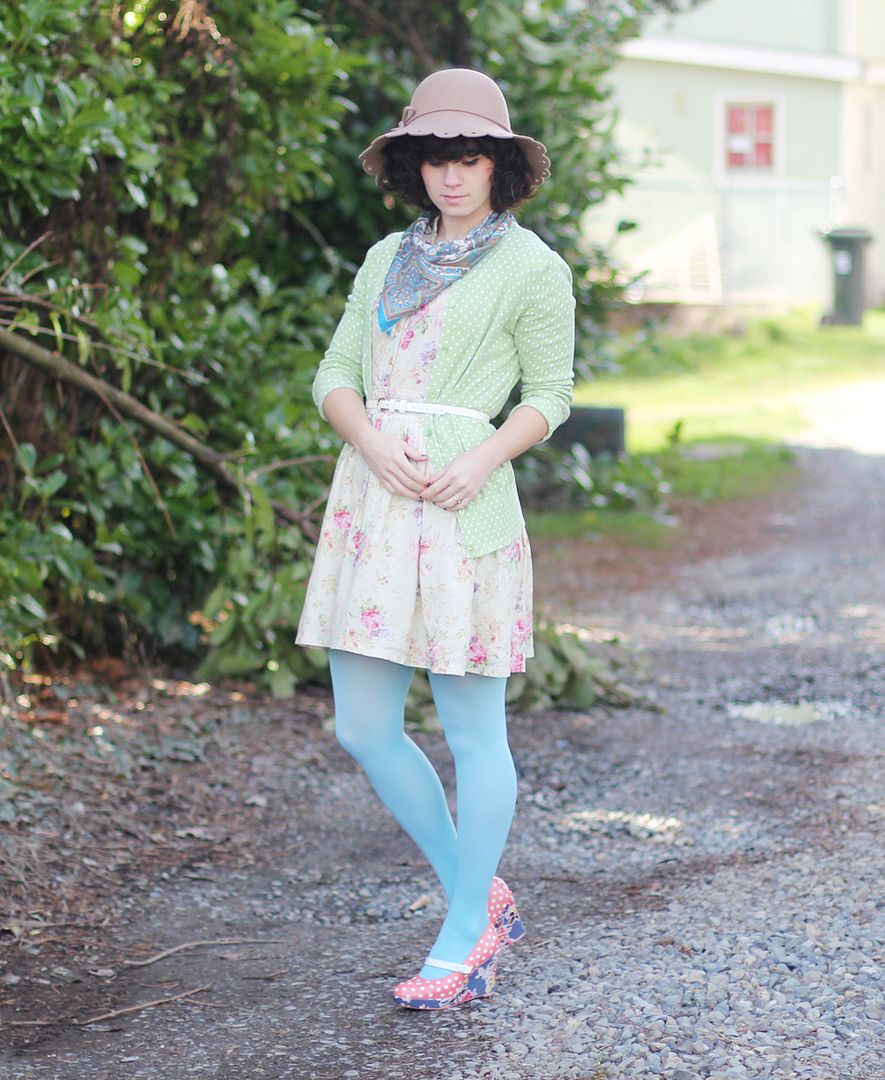
Wondering how to make a shoe clip? Put a twist on the idea and learn how to create an elegant ankle strap. It effortlessly dresses up a simple pair of heels with vintage-inspired charm and detail. ♥ Enjoy!

xo,
Ruche

P.S. If you're looking for heels, peruse our wedding shoes and more classic heels to find the perfect pair.

Wedding Bouquets: An Interview & DIY Project


We recently had the pleasure of working with Mai, the creator of Bunch Studio, and her team. They helped us create our wedding vision with their gorgeous flower arrangements and bouquets. Take a peek into Mai's creative mind below. ♥

When did your love for flowers and designing begin?
I've always had a preference of creative outlets over anything else academic... it's worked out for me so far. I am also an interior designer by trade, so I have respect and appreciation for all things beautiful and well curated. A room, space or event is never complete without the presence of natural botanicals.

What does a typical day in the studio/shop look like?
Cold early mornings at the Los Angeles flower mart, anywhere from 4am to 10am... leaves, petals, and branches everywhere at the studio mid-day, and late nights at the computer. There really are no breaks, but the work is quite enjoyable so you don't always notice when the day has passed you by.

Do you like to garden at home?
I do not have a green thumb, but my goal is to master the art of gardening as we just moved into a space with a 4,500 sq ft yard!


What was the process like for creating Ruche bridal bouquets?
It was a fun palette to work with, and the garden theme gave us more range with the shapes of the bouquets.

Are there any behind-the-scenes moments from our bridal lookbook to share?
The urns at Kimberly Crest had some well rooted aloe plants that we thought were going to be easy to temporarily uproot and replace with our arrangements. While it worked out beautifully, it was quite a process we didn't anticipate. Also both my assistants grew up with horses, which was really helpful when we had to shoot with the ponies.


For a bride on a budget, what flowers would you recommend?
If garden roses aren't in the budget, try standard / Ecadorian roses that are fuller in bloom. Stock and lisianthus are great filler flowers and look really lush in dense quantities. Using just one flower type everywhere makes a great statement, no matter what the flower is. Always aim for seasonal or local.
♥

Thank you so much, Mai! We truly appreciate all the beautiful work you created for us. Ruchettes, be sure to stop by our Wedding Guide and learn how to create wedding bouquets. Bunch Studio shared their recipes from our bridal lookbook!

xo,
Ruche

Wednesday, March 28, 2012

Wedding Wednesday: Confetti Hearts DIY

Celebrate with the newlyweds and toss confetti into the air with this adorable DIY project by Dear Lizzy. To see more wedding projects, view our wedding guide and plan the perfect wedding and be sure to stop by Dear Lizzy for more inspiration.

xo,
Ruche

Thursday, March 8, 2012

Project DIY: Mason Jar Pin Cushion


How To Make a Mason Jar Pin Cushion
Guest post by Angelina
Supplies
Mason jar and lid
Heavy Cardstock
Scissors
Fabric
Batting

Instructions
Separate the mason jar lid from the ring. Trace around the lid on your cardstock and cut it out.

Take the cardstock circle and place it on the fabric of your choice. Cut a square around it and leave extra room to work with later.

Push the fabric square through the lid's ring from underneath. Stuff it with batting.

Place the lid inside the ring to secure the cushion.  Adjust the fabric to remove wrinkles and then trim off the excess fabric. (Note: Trim it as close to the edge as possible. The mason jar lid won't seal if the fabric is too bulky.) Pull the fabric tightly and glue the edges down with hot glue. Glue the cardstock circle in place for a clean finish.

And there you have it, folks! A sweet little mason jar pin cushion that is ready to be filled with pretty little things.

-- Anjelina, from Ruby Jean

♥

See more DIY projects here! If you would like to join our Ruche Blogger Family, please send an e-mail to blog@shopruche.com and attach photos. You will receive an e-mail if your post is selected. Thank you!

P.S. Do you have any spring projects and recipes that you'd like to share? Here is your chance to be featured on Ruche! See the details for our spring/summer guide here.

Thursday, March 1, 2012

Spring Hair Tutorials


Delight in our spring hair tutorials and awaken to an enchanted daydream. ♥ Soft curls, a braided crown, and an elegant updo await.

xo,
Ruche

Project DIY: Floral Wedges

We spotted this genious (and amazing!) tutorial on Delightfully Tacky. With spray paint, fabric, and your essential craft tools, you can transform a pair of wedges into a new gem.


Stop by Delightfully Tacky for step-by-step instructions. Happy crafting!

xo,
Ruche

P.S. There is no such thing as too many shoes, right? ♥ Take a peek at our affordable shoe collection here.

Project DIY: Enchanted Spring Flowers

With tissue paper and a touch of creativity, the Ruche family created these enchanted spring flowers for our lookbook. Wondering how they're made? Stop by Design Sponge for the tutorial! They're perfect for boutique decor and engagement photo shoots. ♥

Do you have any spring projects and recipes that you'd like to share? Here is your chance to be featured on Ruche! See the details for our spring/summer guide here.

xo,
Ruche

Thursday, February 23, 2012

Project DIY: Fabric Bracelets


Perfect for spring accessories, take a peek at this lovely DIY bracelet tutorial.

Supplies Needed:
-- Sewing machine or needle and thread
-- Plastic bracelets (I thrifted these two for $1)
-- 1" strips of fabric
-- A dry double-sided adhesive (this is what I used)
-- Mini glue dots for touch-ups

Instructions:

Attach fabric strips together with a sewing machine or a needle and thread. Be sure to experiment with your fabrics! Try wrapping the bracelet first just to see if you like the spacing and length of the fabrics. Adjust accordingly.

Add a generous amount of adhesive to the bracelet and then slowly wrap the sewn fabric strip around the bracelet. Add adhesive as you wrap the fabric.

Inspect the bracelet and add glue dots to the spots that seem loose or unfinished. And then you're done! Stack them together and love!

-- Mandi, Thinking About Pretty

♥

See more DIY projects here! If you would like to join our Ruche Blogger Family, please send an e-mail to blog@shopruche.com and attach photos. You will receive an e-mail if your post is selected. Thank you!

P.S. Do you have any spring projects and recipes that you'd like to share? Here is your chance to be featured on Ruche! See the details for our spring/summer guide here.

Monday, February 20, 2012

Picture This: Digital Washi Tape


Hello, I'm Shannon from Little Luck Tree. Here's a fun photoshop tutorial for adding digital washi tape to your images. For this tutorial, I used a great Tape Strip Freebie from Pugly Pixel found here.

The first thing you need to do is open your image in photoshop and make the canvas bigger to make space for your tape.


Select "Image" --> "Canvas Size" and add space just to the "Height". In the "Anchor" box, click the bottom center box. (Note: If you'll be adding tape to different sides of your image, leave the "Anchor" box centered, and add space to both the "Height" & "Width")

Open the washi tape image you want in a new photoshop file. Select the "Magic Wand" tool and check the "Contiguous" box. Then click on the washi tape image you want. (Note: You may have to adjust the tolerance level or click a few places until the entire strip is selected.)


Once you've selected the tape, copy it and paste it onto your original photo.

Now adjust the size and location of your tape. I like to use the Command+T (Control+T for PC users) shortcut; it will allow you to size and rotate the tape. I like to make it slightly tilted--it gives it more of a messy-tape feel!

In the "Layers" tab, adjust the Opacity of the tape to show a hint of the photo underneath.


That's it! Play with using different colors and textures of the tape, layer pieces, and have fun! It's such an easy way to jazz up your image.


For more tips and tutorials, come visit me at Little Luck Tree!

--Shannon


♥

See more DIY projects here! If you would like to join our Ruche Blogger Family, please send an e-mail to blog@shopruche.com and attach photos. You will receive an e-mail if your post is selected. Thank you!

P.S. Do you have any spring projects and recipes that you'd like to share? Here is your chance to be featured on Ruche! See the details for our spring/summer guide here.

Thursday, February 16, 2012

Project DIY: Business Card Holder


Business Card Holder DIY
Guest Post by Julie

I was struggling to think of an idea for displaying my business cards at the show this weekend. I didn't want to get one of the standard holders you can find at the store. I wanted something a little more creative, with a handmade touch. With a little embellishment, I was able to turn an old Altoids tin into a cute business card holder!


--Julie, from Julie Ann Art
♥

See more DIY projects here! If you would like to join our Ruche Blogger Family, please send an e-mail to blog@shopruche.com and attach photos. You will receive an e-mail if your post is selected. Thank you!

Thursday, February 9, 2012

Project DIY: Lace Mason Jars


Project DIY: Lace Mason Jars
--Stacey, from Stonewash and Bloom

Materials needed:
lace
thick and thin lace trim (optional)
mason jar
scissors
mod podge
brush for mod podge
heat gun or hair dryer

Instructions:

1. Start by measuring out a piece of lace that will wrap around the entire base of the jar.

2. Brush mod podge all over the jar and begin wrapping the lace all around the jar.

3. As you wrap, brush mod podge on top of the lace so the lace is sandwiched between a lot of mod podge.

4. Continue to wrap around the jar until both ends of the lace meet each other. Secure with a bit more mod podge at the seam, and then apply heat to help it dry faster and in place.

5. Once the seam is secure, flip the jar upside down, and fold the edges over the botton and secure with mod podge. Apply heat to the bottom and push the lace down as tightly as possible to the bottom of the jar.

6. Flip the jar back right side up and begin applying mod podge to the lace at the lip of the jar. Apply. Smush. Heat. Apply. Smush. Heat. Repeat. (Real professional word choice, eh?)

7. Trim the excess and begin applying the thick lace trim on top, securing with both mod podge and heat.

8. Then apply the thin lace trim to the very top rim of the jar and you're done!

Surround with beautiful flowers and light a candle inside or use as vases and centerpieces. You can always add some twine for detailing, or a tag for a gift container. And of course, color is always welcome!

--Stacey, from Stonewash and Bloom


♥

If you would like to join our Ruche Blogger Family, please send an e-mail to
blog@shopruche.com and attach photos. You will receive an e-mail if your post is selected. Thank you!

Thursday, February 2, 2012

Project DIY: Heart Cutout Dress

Perfect for Valentine's Day, take a look at this adorable dress tutorial! ♥


Guest post by Stacie

What You'll Need:

- Pins
- Tape
- Marker
- Dress (preferably not jersey knit, stiffer fabrics work best)
- Some sort of ribbon, lace, something to pin around the edges of the cutout heart
- Sewing machine and iron

Total Cost: Dress + Ribbon/lace
Total Time: Approx. 2 hours, shorter if you're a good seamstress.

Instructions:
1: Lay your dress out flat and tape over the chest area where you will be cutting your heart shape.
2. Draw the heart shape on the tape and then cut it out. Do not take off the tape because it helps keep everything in place so the fabric does not shift. 
3. Take your pins and pin the ribbon around the edges of the heart cutout so that the fabric is finished and won't fray.
4. After you have pinned the ribbon or lace all around the heart, stitch carefully to hold the ribbon in place.
5. After you have stitched everything, you can pick off the tape and then iron down the ribbon/lace so that your seams are crisp and flat!

That's it!

--Stacie Grissom, Stars for Streetlights


♥

If you would like to join our Ruche Blogger Family, please send an e-mail to
blog@shopruche.com and attach photos. You will receive an e-mail when your post is selected. Thank you!

For more Valentine's Day ideas, view our roundup here!

Thursday, January 26, 2012

Project DIY: A Dollhouse Suitcase

We stumbled across this charming handmade dollhouse and we simply adore the vintage-inspired aesthetic. Visit Hart & Sew for more photos and detail! ♥

xo,
Ruche