Showing posts with label picture this. Show all posts

Monday, February 27, 2012

Picture This: Live It Out Photography

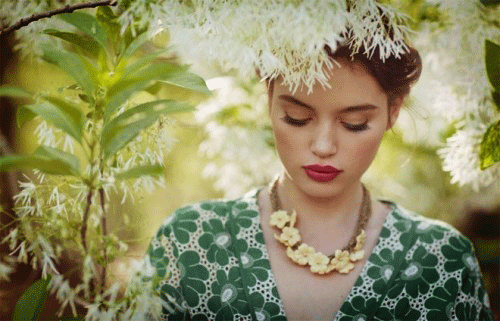
We recently posted an amazing photo shoot and we realized how much we adore the photographer, Amber Mahoney. Take a peek at photographs from her first lookbook below. ♥

Stop by Live It Out Photography and Amber's Pinterest for more gorgeous photographs and inspiration.

xo,
Ruche

Monday, February 6, 2012

Picture This: How to Add Sparkle

Photoshop Tutorial: How to Add Sparkle

1. Open a blank image document in Photoshop and create dimensions between 200-300 pixels. The range you choose will determine the range of your Sparkles Brush.


2. Select the Brush tool on your left Tool bar.


3. Then scroll down the Brush Presets panel on your right toolbar. You’ll find a few varying “star “or “sparkle” brushes.  Select the size 70 brush.


4. Stamp the brush a few times randomly and however you like. Try to limit yourself to 3 or four stamps.


5. Select a soft round brush (we chose the first brush option on the panel) and repeat step 4, randomly stamping. You can adjust the size as well.


6. Select “Edit” then ”Define Brush Preset” from your top Menu bar and name your brush (i.e. Sparkles Brush). Then Click “Ok.”


7. Open the image you’d like to use and create a new Layer so that you won’t affect your original image and can make changes.


8. Then select your Sparkles brush from your Brush Presets panel.


9. Next play around with your brush settings. Try selecting “Shape Dynamics” and “Scattering” to add some variation to your brush. Also play around with the “Size Jitter,” “Minimum Diameter,” and “Angle Jitter.” You can look to the lower box to see what effects all these options will have. Lastly, in your “Control” box, select “Fade.”


10. Begin to Stamp on your new layer and notice how the brush is randomly applied. From here on you can scatter it however you like.


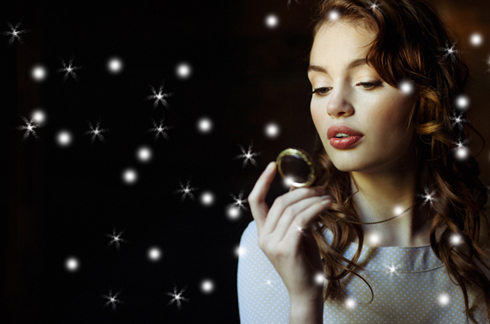
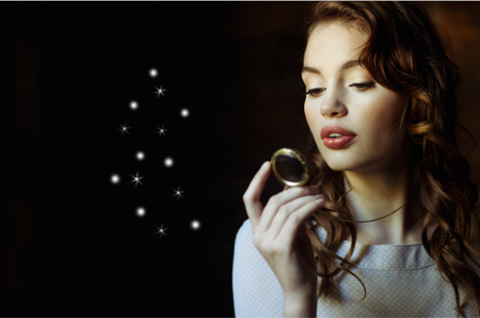
11. You can also delete sparkles from certain areas using the “Eraser” tool. We decided to erase any sparkles on her face. Once you have the effect you want, save and you’re done! Enjoy your new whimsical photo.


xo,
Ruche

Monday, January 30, 2012

Picture This: A Vignette Photoshop Tutorial

Learn how to create a vignette photo effect in Photoshop with these simple steps. ♥

1.       Open Image in Photoshop


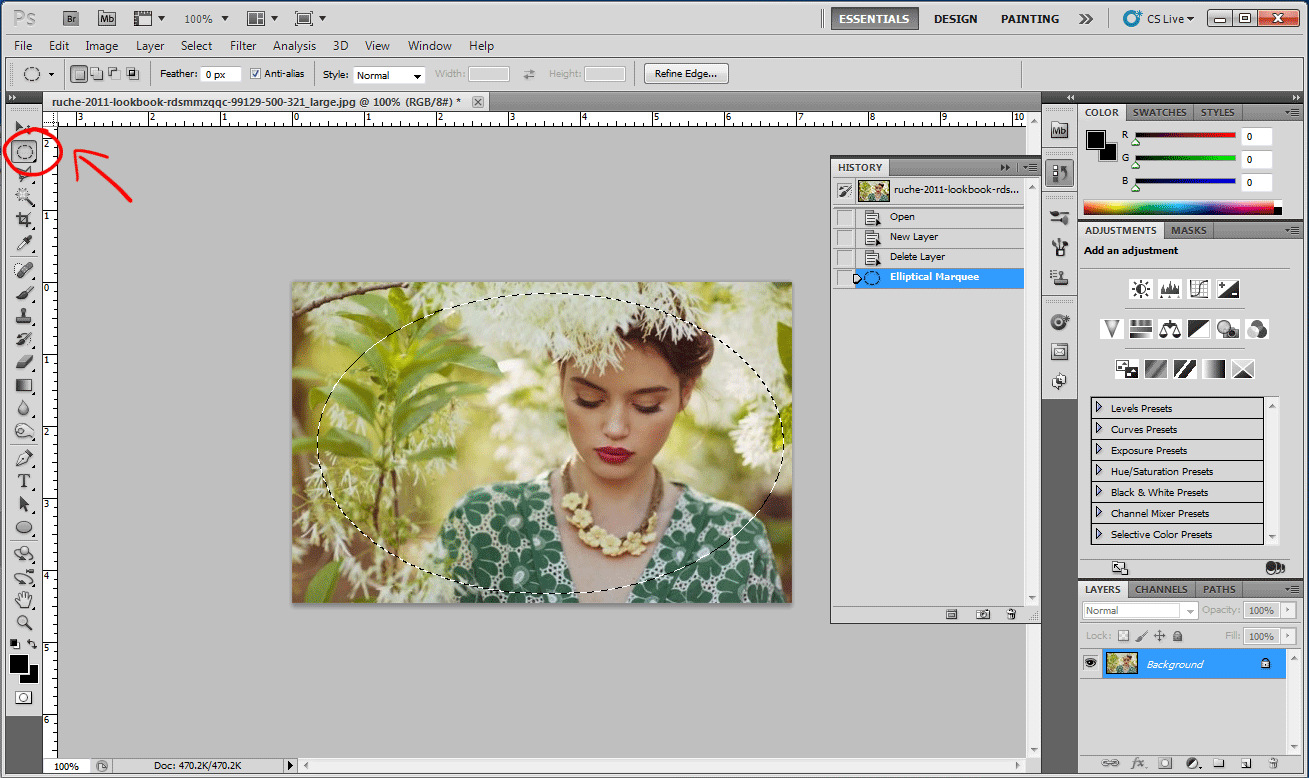
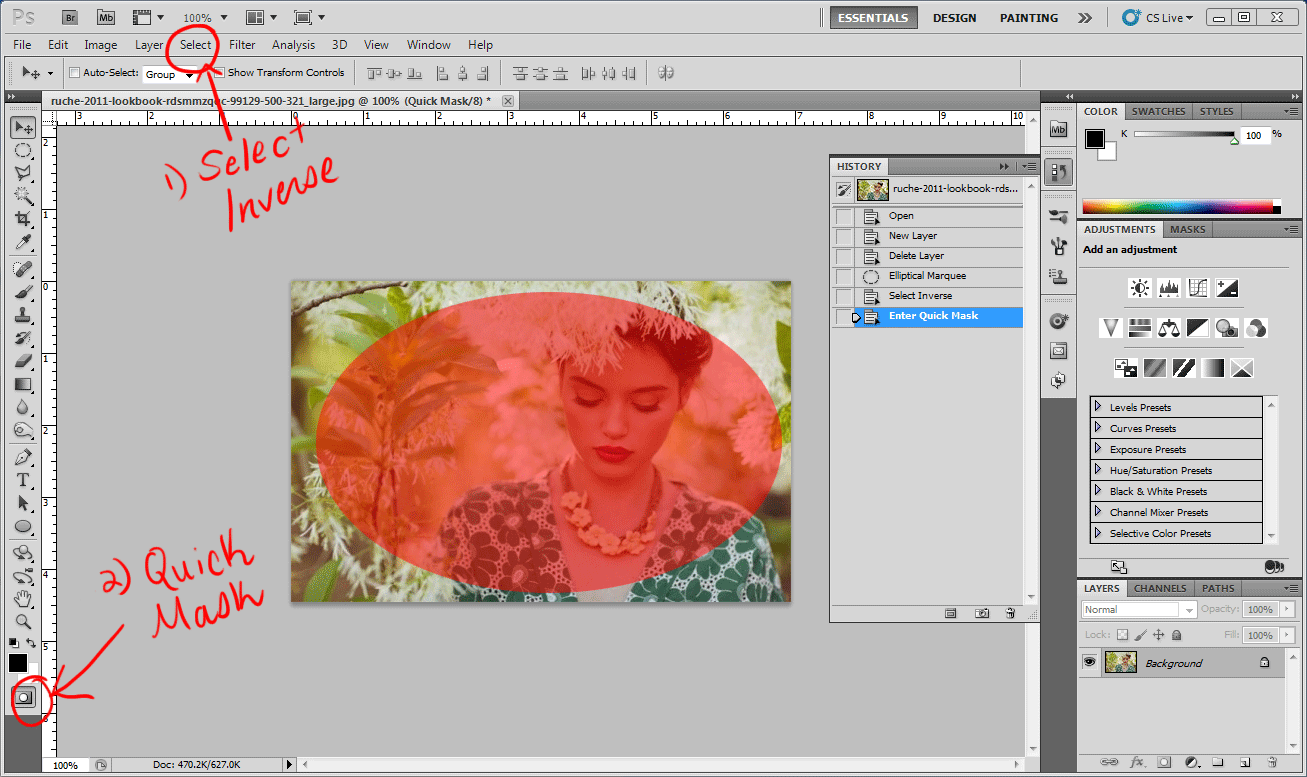
2.       Select the Elliptical Marquee tool (if it isn’t visible, click and hold the marquee icon which will show a menu of options, including the Elliptical Marquee) and draw an oval shape around the center area of your photo. (Any area you don’t select is going to be shaded.)


3.       Next choose “Select > Select Inverse” in the top Menu. Then enter “Quick Mask” mode by clicking the camera icon on the bottom left.


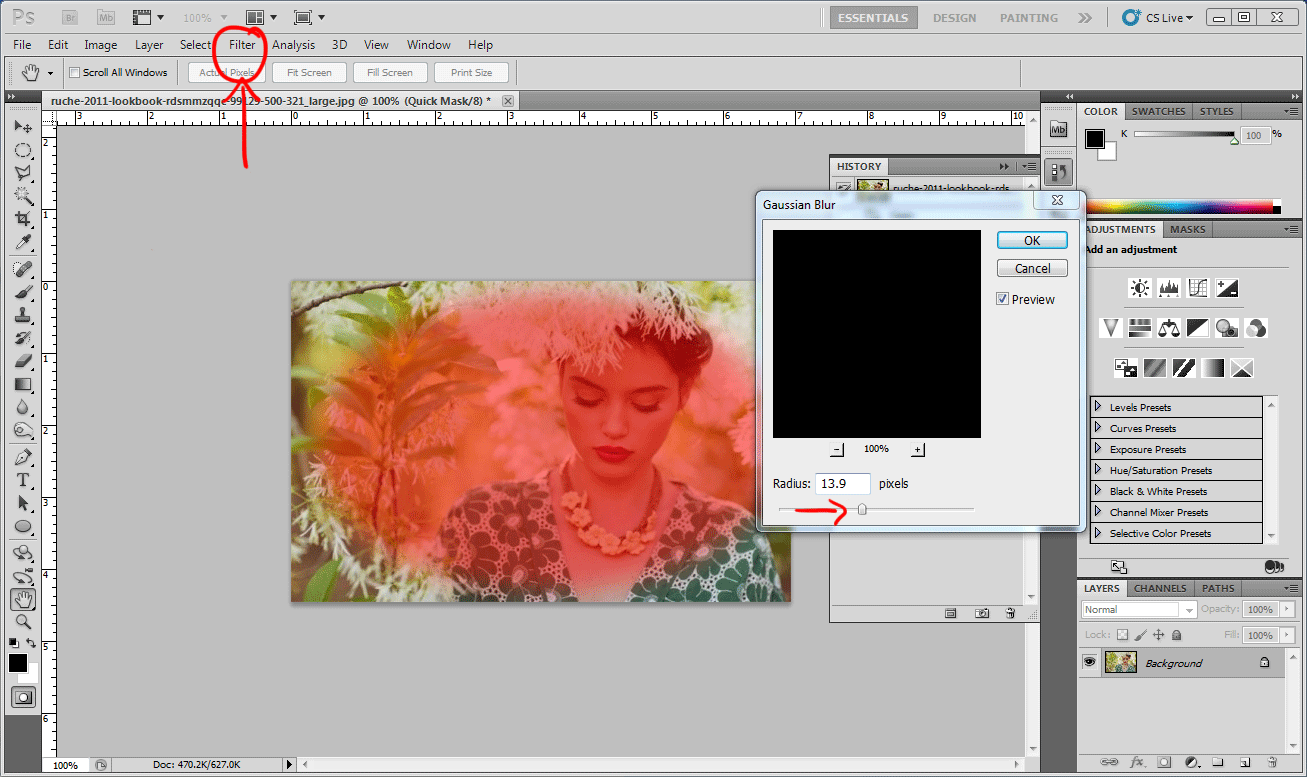
4.       On the top menu bar, select “Filter > Blur > Gaussian Blur.” A menu box will appear where you can make your adjustments. The more blur you add, the more smooth the transition of light to dark will be in your vignette. Exit Gaussian Blur (click “Ok”) and Quick Mask (Click the camera icon again) when you’re done. (The edges should already be selected when you exit “Quick Mask.”)


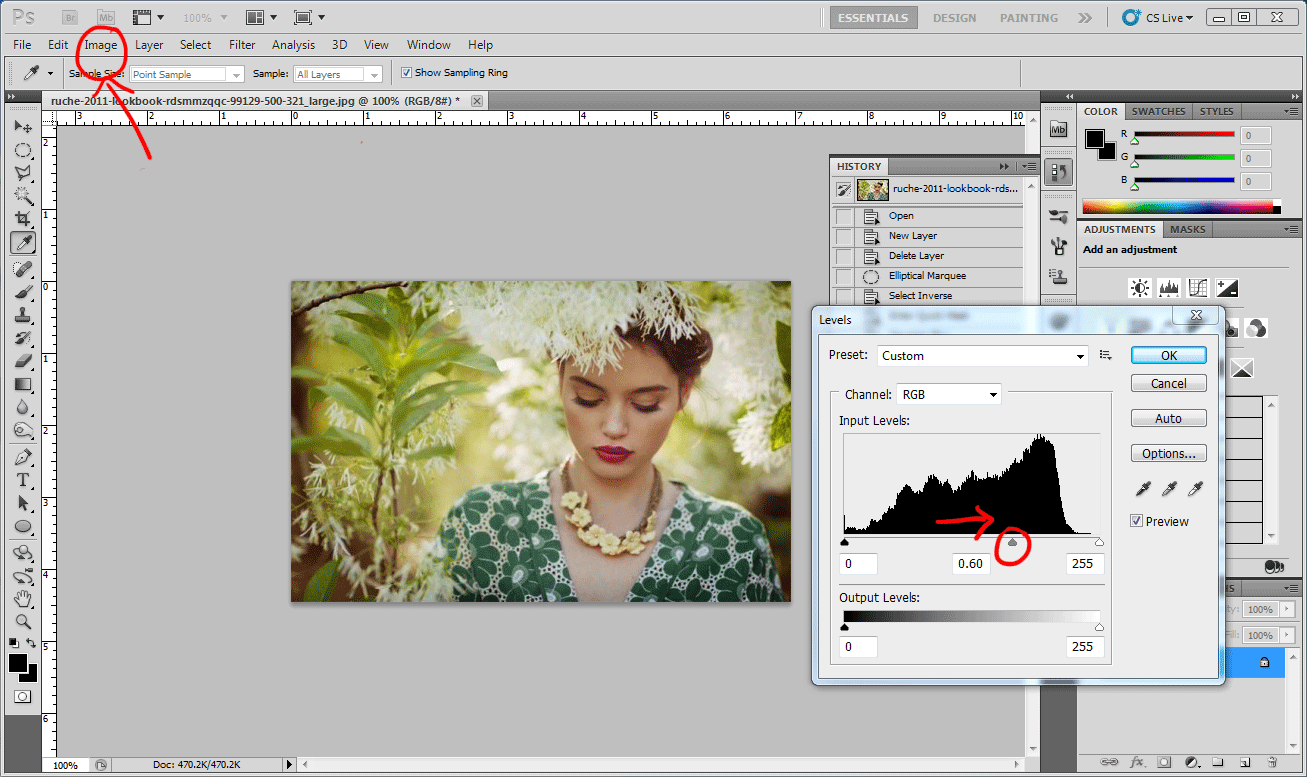
5.       At the top menu again, select “Image > Adjustments > Levels.”  In your Levels box, use the top center arrow to darken the outside of the image, making your vignette. Moving the slider to the right will darken the edges, and moving it to the left will lighten it. Make sure “Preview” at the bottom right of your Levels box is selected so you can see what your image will look like.

 
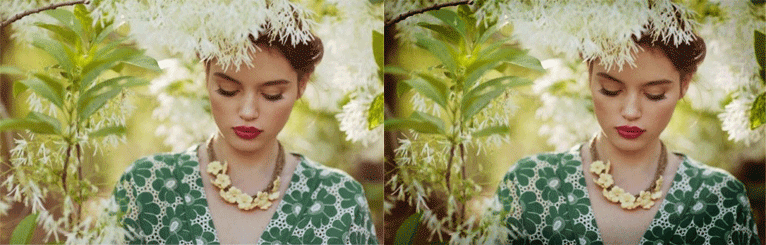
6.      Hit “Ok”and Deselect the image (“Select > Deselect” or Ctrl + D) and you’re done! Enjoy you’re beautiful vignette image.

Before & After

xo,
Ruche

Tuesday, January 17, 2012

Picture This: A Home Photo Studio

Guest post by Eileen
Set up a Photo Studio in your Kitchen!

A common misconception that I have heard time and time again is that people who feature beautiful product photos on their blogs must either be professional studio photographers, or at least have fancy equipment and lots of spare time.  I am here to dispel that myth – and demonstrate how with just a few basic items, a little planning and even less time, you can create a studio in your kitchen, (or any natural light-filled space) where you’ll be able to take great still-life photos!

In addition to choosing a spot in your house with good natural lighting, for this set-up you will need:
-- Table or flat surface
-- Selection of fabric, decorative papers, textural backgrounds
-- White foam core board (to use as a reflector)
-- Elmer’s Sturdyboard Stand 
(to prop up your board)
--
White tissue paper or sheer fabric (to diffuse bright light)
-- Camera + items to photograph
-- Tripod (optional)

My kitchen setup:

Depending on where you live, the time of day, and which direction the light is coming from – you may or may not have very bright light streaming through the window.  I’m in Seattle, so harsh sunlight on a winter day isn’t usually an issue.  That said I still like to cover the glass with some white tissue paper, which acts as a diffuser and creates a softer light.

My table covered with some white fabric + a teacup from Goodwill:

Cover your table or floor with the background material of your choice, and arrange your photo the way you want.  Have your foam-core light-reflector handy, and set it up near your items but outside the frame of your photo.  Take a few shots with and without the reflector to see the difference it makes.

Here you can clearly see a change to the shadow in the upper right corner of the shot.  And while it’s not gone completely in the second photo?  It is significantly better, and even the background feels softer with fewer shadows in the crinkled fabric.

It’s always a good idea to take lots of photos. (Read: “way more than you think you should”...)  In this age of digital photography there is really no reason not to, and the way I look at it?  The more you take, the chances are significantly better that you’ll end up with several that you like!
Once you feel like you’ve captured your scene adequately, move your items, change your background, switch things up a bit and keep on going!  Here I placed the teacup on my concrete floor, removed the fabric and added a white dish.


For a more interesting photo, try cropping part of your subject out and shooting from an angle:


. . . and zooming in!


I love doing product photography and color stories this way because the possibilities to what you can create are endless! 
So there you have it. With just a few basic supplies, some natural light and a little creativity - you can achieve those professional photography results you’ve always dreamed of.

--Eileen Nishi
www.westofwhimsy.com
www.westofwhimsy.etsy.com

♥

If you would like to join our Ruche Blogger Family, please send an e-mail to blog@shopruche.com and attach photos. You will receive an e-mail when your submission is selected. Thank you!

Tuesday, January 10, 2012

Picture This: A Trip to Seattle


I love this quote from the movie, Love Happens:

"During your travels it's important to always keep one thing in mind, when one thing ends, something else begins."

Fun fact: The movie was filmed in Seattle and the filmography really inspired me to go there. ♥


-- Laura
Polaroids and Kisses

Tuesday, December 27, 2011

Picture This: My Heart Belongs in...

Guest post by Charming Gypsy

I was born in Canada and live in Canada, yet my heart seems to always be in New York City and I wanted to create a photo collection with a few photos I took the last time I visited New York. I love taking photos that capture something unique and that will help me remember exactly where I was when I took the photo. I hope that others will enjoy these photos too!
♥

Join our Ruche Blogger Family! Click here for details.

Monday, December 19, 2011

Picture This: How to make a mirror image

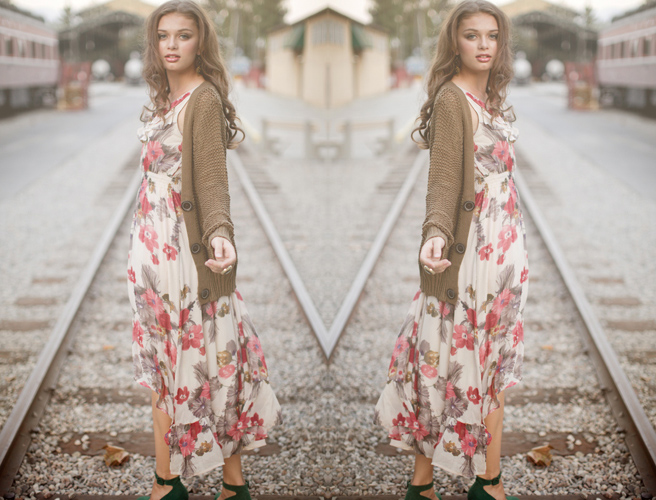
Seeing double can sometimes be a lot of fun. In today's tutorial we will go over a quick and easy technique to mirror your images.


Step 1.Open the image you want to manipulate in photoshop. Open a new canvas twice the width of your image. Using the move tool, drag a copy of your opened image onto the canvas.


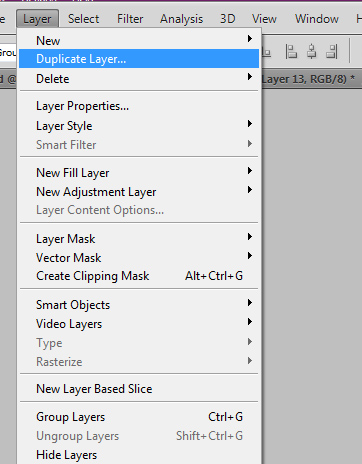
Step 2. Go to the original image you opened in Step 1. Go to Layer>Duplicate Layer. You will see a copy of your image show up on top of the original image you opened. Next go to Image>Image Rotation>Flip Horizontally. Your new image will now be flipped.


 Step 3. Using the move tool, drag your new image to your canvas. Align your two images, crop your canvas and enjoy your creation.


Easy as Pie! See more of our photoshop tutorials.

Picture This: Richard Avedon

Richard Avedon's work has been described by the New York Times as defining "America's image of style, beauty and culture for the last half-century." For over fifty years, his work has been featured in the world's most renowned fashion magazines. The spontaneity of his subjects' movement and his minimalistic style have made Richard Avedon one of the most beloved American photographers. 

Monday, December 12, 2011

Picture This: John French

John French was one of London's top fashion photographers during the 1950's and 1960's. He pioneered a new form of fashion photography that utilized natural light and low contrast. His flawlessly lit images have appeared in virtually every newspaper and fashion magazine.

 
Source: one, two, and three

xo,
Ruche